I was really intrigued by the idea of a stick foundation, and I'm constantly looking for something that's good for my oily skin and comes in several shades, because I'm so pale that I make Edward Cullen look tan.
... OK, not really.
But, I do usually need the lightest shade of any face makeup that is available, so I'm always looking for makeup that has a large range of shades, and with a "shine-free" claim, I found it hard to resist. As seen in the above picture, I got 110 Porcelain, which is the lightest shade it comes in.
What makes this foundation unique (or at least, what Maybelline claims makes it unique) is that it is a gel foundation with an anti-shine powder core.
While there is a clear color difference in the "anti-shine powder core" and the gel foundation of the outer ring, I was skeptical as to the actual differences between the two, so I went ahead and swatched each of them, as well as the stick as a whole.
As you can see on my hand, the coverage is fairly light, and it matches my skin fairly well. It does look a touch yellowy in the above photos, but did not turn out that way in actual use. As you can see from the individual swatches on my fingers, there is a distinct difference in the formulas of the inner core and outer ring. The inner core, on my pointer finger, is much thinner, lighter, and more lightweight. I actually rubbed it a bit more than I did on the outer ring, and it's still much lighter and thinner. On my ring finger, I just did a light swipe around the outer ring, and found that it was a darker, more yellowy shade, which had a thicker consistency and more coverage. It appears that these two blend to create a foundation that should be able to blend into both warmer and cooler skin tones, as well as fitting a wider shade range.
First Test:
In both pictures, I had already done my eye makeup. The picture on the left is my natural complexion, the only makeup being my eye makeup. My face had no moisturizer, primer, etc. The only comment I have about this picture is that I don't feel like it fully captured all of the redness of my face without makeup. I have many many acne blemishes which also aren't as apparent in the picture, and those cause my face to be very red, and you can't tell quite as much based on this picture.
The picture on the right is after applying my regular primer (L'Oreal Studio Secrets Color Correcting/ Anti-Redness Primer) and the Maybelline Fit Me! Shine Free Foundation. For the first impression, I used my fingers rather than a brush.
First Impressions:
I was really happy with the color of the foundation, because it was actually light enough for my extremely pale skin. After applying the foundation, my skin felt extremely soft, which I really love. However, I did have to apply quite a bit of the foundation to be able to achieve the coverage shown in the picture, especially in my cheeks. I have the hardest time covering the pinkness of my cheeks, and the only way I was remotely able to with this was to dab it on and blend it by patting.
Long Term Wear:
For a couple days, I used the Fit Me! foundation as my primary foundation and will be playing around with it in multiple ways to see how well the foundation holds up during the day.
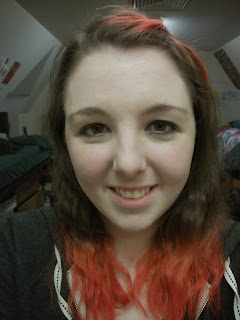
Both of these pictures are here to use as references for my starting point- my makeup-less face immediately after going through my skincare routine (which, for a while, has been the AcneFree System). The one on the left was taken without flash, and the one on the right is with flash. I feel like the one on the right is a bit more accurate at depicting the redness of my face, which is why it's included.
Day 1: On its own
For my first test of it, I decided to test how well it stayed throughout the day, without using any other product such as a primer or setting powder.
I first applied the stick all around my face, and then instead of using my fingers as I had for my first test, I blended it with my E.L.F. studio powder brush, which I think worked better for application. I got better coverage, probably due to the fact that the brush applies less pressure to the makeup than my fingers do. As shown above, my skin tone looks completely even, and very matte.
Pictures using flash make my face look like it has a bit of an odd coloration, which actually isn't the case. I'll have to play around with this a bit, but this definitely could be one of the "dreaded white cast" foundations. On the plus side, however, it does make my skin feel really soft once again! As you can (slightly) see, the foundation eliminated a lot of my face's redness.
By the end of the day...
By the end of the day, I felt like it was completely gone. I looked at it several times throughout the day, and I'd say it probably only stayed completely in place until maybe 1 or 2, which was only 3-4 hours after I applied it. Overall, I was not really impressed with how well it stayed on by itself.
Day 2: Integrated into my normal routine
For day 2, I inserted it into the place of my regular foundation. I used my L'Oreal Studio Secrets Color Correcting/ Anti-Redness Primer, and then applied the Fit Me! Foundation Stick and used my E.L.F. Small Stipple Brush to blend it, to see how it reacted to a less dense brush. I followed that up by using Physician's Formula Loose Mineral Powder to set it.
Unfortunately, I totally forgot to take a picture of my face prior to applying the makeup, but it was pretty comparable to the other pre-makeup looks. Just as the day before, the makeup started out very matte. Both of the above pictures are without flash, but I have a bit different coloration in them due to the backgrounds. Also, because we've been going through climate changes, my face was fairly dried out on the lower cheek area near my mouth.
This picture was taken about midday. As you can see, the large pimple on my chin wasn't covered well at all, and the foundation was clinging to the dry skin around my chin and cheeks. Rather than looking and feeling soft, it both looked and felt pretty rough.
By the end of the day...
I'd say I got fairly similar results as the day before. As you can see in the photos, the pimple on my chin got worse throughout the day, and I wouldn't be surprised if it was due to the foundation. I usually have several blemishes, but it's been a while since I got that large and painful of a pimple, and I didn't change anything else about my skincare routine. The flakiness was even worse by the end of the day. It kinda reminded me of using a cheap stick concealer that just pigments scabbed pimples rather than concealing them.
Overall Opinion On...
- Color: I think the color was really good. It's rare that something is pale enough for me, and it came in a huge range of colors. If you're like me and have a more cool/pinky undertone to your skin, it might be just the slightest bit yellowy, but I did't think the color looked bad at all.
-Coverage: It's definitely light to medium coverage. It's buildable, but I did find it a little difficult at first to cover my cheek redness.
- Staying power: Not the best. It didn't stay that well with or without the primer. My cheeks and blemishes were definitely red by the end of the day.
- Skin Types: I wouldn't recommend this for people with dry skin, and maybe not even people with combo skin. If you have dry skin, it will be super flakey. It never looked terrible on my oilier parts of my face, but my cheeks didn't look great most of the day.
Will I Use It Again?
By no means will it become a part of my everyday routine. I'm also not going to be throwing it away either. I'll probably stick it in my purse for when I'm out of the house and need to touch up or maybe even to be used as foundation when I'm on a road trip or something like that. In the end, it just didn't work well enough for me to use it on a regular basis.
So, there's my review of the Maybelline Fit Me! Shine Free Foundation Stick! I hope you enjoyed it, and that it helped you decide whether or not you'd like to try it out. Or, if you've already tried it, what did you think of it? Did it work better for you? Let me know all of this in the comments, as well as any other questions you may have for me. I'd love to answer them! See you next time, y'all!


