Showing posts with label blender. Show all posts

Tuesday, April 8, 2014

Post Project 10 Pan Makeup Haul!


Hey, y'all! So as you know, I finished my Project 10 Pan last week! Woot! So, since I'm going to go back on a makeup buying ban, I bought several things- mostly pretty inexpensive, but a couple high end thrown in. The majority of the products are shown above, but I also bought something after these and have an order for some other things.

So, I'm just going to talk about the products individually and give mini-reviews as well as discuss the products I haven't gotten yet. 

Laura Mercier Tinted Moisturizer- Porcelain

So, this was one of my high-end purchases. I've never tried a tinted moisturizer, but I wanted something lighter than foundation because it's almost summer and I want to be a bit nicer to my (very acne-prone) skin. Plus, it's oil free, so it's not going to oil up my face. I saw several reviews on Youtube saying that this was really great as far as tinted moisturizers go. However... I'm returning this on Saturday. I tested it in-store and thought it looked like a good color match, but when I got it home and looked at it in the natural light... NOPE. Way dark and brown on my skin, and it's the lightest shade. Normally, I'd try to make it work, but I have reached my threshold of too-dark face products and I don't want to waste my money on something expensive that I'm probably not going to use. I can't really give much of a review on this, since it was way too dark for me to wear out of the house, but I can say that a lot of people really like this. Yay for return policies!

Real Techniques Expert Face Brush

I've been wanting to get this one for quite a while, because several of my favorite beauty gurus on Youtube have been raving about Real Techniques Brushes, especially this specific brush. It's really dense and great for packing on powder foundations for maximum coverage. I haven't gotten to use this enough to get a great feel for it (partially because I've been obsessing over another applicator that you'll see soon), but so far I really like it.

Real Techniques Stippling Brush

Stipple brushes have always been my preference for applying liquid foundation. My most recent favorite has been the e.l.f. small stipple brush, but I really like this one, possibly more than the e.l.f. one. This one is a little larger than the e.l.f. one, and is made a bit better. Also, the longer white hairs don't stick together as badly as the ones in the e.l.f. brush, allowing it to go a bit longer between cleanings. Overall, I really like this. 

Rimmel Stay Matte Liquid Mousse Foundation
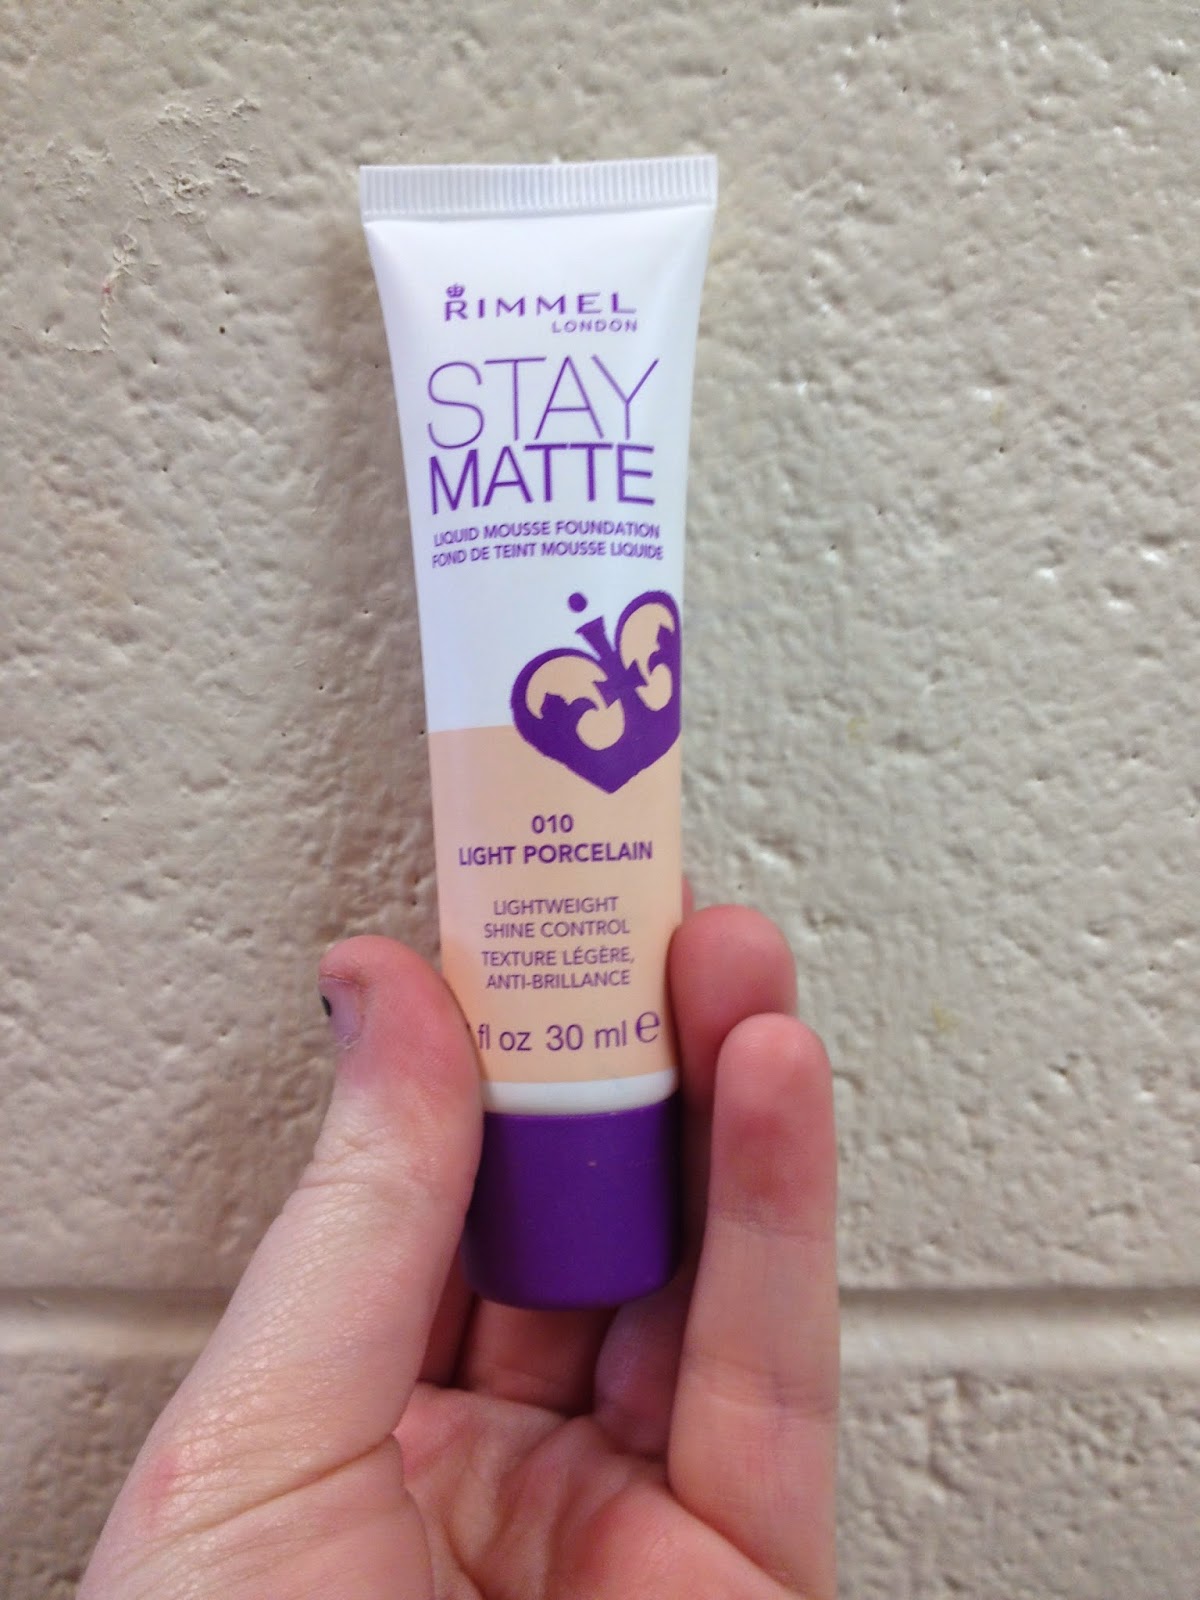
Per usual, I have the lightest shade of this. I compared it to my Revlon ColorStay and noticed that even though the Ivory shade of ColorStay (the lightest shade) has a slight pinky undertone, it pales (terrible pun) in comparison to this. It's very very pinky undertoned. As far as formulation goes, it definitely didn't stay put as long as I expected it to. Even after setting it with powder, it only stayed in place a few hours. But I'll play around with it in the next few weeks and see what I can get out of it. One good thing I have to say about this is that it has a pretty decent light shade range. This is definitely quite a bit lighter than the lightest shade of most foundations I come across, especially considering that it's a drugstore foundation for about $5. So if you're pale like I am, and have pinky undertones, I'd give this a try. When given the choice between amazing staying power and great color-match, I'd go for color match every time. But that's just my opinion, as a person who can rarely find a light-enough foundation.

 Rimmel Stay Matte Translucent Powder

This was a purchase that was less from curiosity and more from necessity. Even though I had a translucent setting powder as part of my Project 10 Pan, I completed that within about a month and then went back to using my Rimmel Stay Matte, which previously had been almost completely full...

Yeah, I can't really get my big fluffy brush in there very well anymore. It was best just to move on and get a new one while I was buying other makeup. As for a review, this is my favorite setting powder. I say this a million times every single makeup post, but I'm really pale, so it's hard to find a face powder that matches. The fact that it's translucent is really great, and I've found that it actually is translucent, unlike some others I've tried. 

Wet & Wild Eye Shadow Palette- Comfort Zone

I know what you're thinking- how on earth did I not already have this?! Well, put simply, I didn't discover how great these shadows were until recently, and at that point I'd just gotten a Naked 2 palette and didn't want to buy anymore neutral eye shadows since a Naked palette is such an investment. I'm sure I'm going to get great use out of this because I like neutral colors. The only one I don't expect to get good use out of is the green color simply because I just don't like green eye shadow. But I'm really excited about that interesting color in the bottom right- is it brown? Is it blue? Is it some really weird combination? Not sure but it's really pretty. I'm also extra excited for the lighter browns and taupe. Not sure that black is going to see much action, but I'm sure it'll get more than the green.

Wet & Wild Eye Shadow Trio- Silent Treatment

It's kinda like a smaller version of comfort zone. I got it mostly for the top and bottom shades. As you might have realized, I like pretty neutral eye colors. Nothing too terribly dark. But I can work with that dark color and see what happens. Overall, Wet & Wild shadows are really great quality and I'm excited to get into both this and Comfort Zone.

Rimmel ScandalEyes Eyeliner- Nude

I was really excited to get this, because of everything I've heard from my favorite beauty vloggers. Using this in the waterline is supposed to be a quick way to widen your eyes and look more awake. As a blogger who is also taking a 19 hour college semester, looking more awake is always appreciated. However, immediately when I used it, I realized a problem...


Will my pale skin ever cease to be a problem? This is darker than my skin, so when I use it in my waterline, it's very visible because it's such a different color. From far away, it does make my eyes look wider and more awake, but you get closer and it's incredibly obvious and looks silly. I really want to try to make it work, because I think it would be a really quick morning makeup trick even on days when I'm not putting on makeup, but if I can't either find a lighter one from a different brand or make this work, I don't think I'm going to be so lucky. 

NYX Matte Finish Setting Spray

I've been eyeing this one for a long, long time. The more matte finish on my face, the better. The longer I can get my makeup to last, the better. I've seen so many beauty vloggers talk about how great this is, and I'm really glad that I've finally been able to get my hands on it. I really like the way my face looks after using it, and I definitely think it helps my makeup stay on for longer. Most people wouldn't be that excited about this, but I was because my skin gets so oily and just eats through my makeup, so this helps a lot.

Beauty Blender

Remember earlier, when I mentioned an applicator I was obsessing over? I was talking about this. It took me a little while to figure out how exactly to use it and what kind of foundation to use with it, but once I figured it out, I fell in love. I really like the natural finish that this gives my foundation. I'm not going to go into any more details because I already did a review of this where I compared this to the CVS knock-off. You can click HERE if you'd like to check that out and find out more about the benefits of the Beauty Blender. It's quickly becoming my favorite way to apply my foundation. 

 So, that's it for the items I've actually purchased so far. I'm not sure yet whether or not I'm going to order something on the NYX website or go to Ulta. They get their NYX shipments on Thursdays, and are sold out of what I want by Friday, but I'm unable to get there on most Thursdays... so I may just order what I want. However, the NYX site gives free shipping if your order is more than 25 and one of the items I want to buy to get up to the $25 is sold out currently. So basically, what I'm going to get depends on whether or not the item I want comes back into stock before I can get to Ulta.

OK, so there you go! I hope you enjoyed this little post- project 10 pan haul! Hopefully, if I have time this week, I plan on posting about my makeup storage and how I've changed it around with new products and getting rid of products, plus a new section I've added on. Basically, I'm shoving makeup down your throat this week. I promise it won't be this makeup heavy for much longer!

Anyway, if you enjoy my posts, I'd love it if you would subscribe/follow, since it lets me know you're liking what I'm doing. See y'all back here either Thursday or Saturday!

Monday, April 7, 2014

Beauty Blender vs. CVS Knock-off: Review/Comparison


Hey, y'all! So, I've bought a few products since finishing my Project 10 Pan, and one of them was the Beauty Blender. I already had a knock-off Beauty Blender from CVS, so I decided to do a quick review/ comparison for the two of them.

Ever since the Beauty Blender became super popular, seemingly every single store that sells makeup- drugstore and high-end alike- have begun to create their own knock-off versions. That's understandable since the Beauty Blender is a whopping $20 dollars for just one little sponge.

I'm going to talk about each product individually, and then compare them.


The Beauty Blender comes in this little container. As you can see below it, there's a little accordion-folded paper, which has the instructions on how to use it. Basically, you're supposed to get the Beauty Blender wet, which causes it to expand, making it even more porous and squishy. Once you've gotten it wet and you can tell that it's expanded, you towel dry it a little. At this point, the Beauty Blender should be just slightly damp. It won't be completely dry, but as long as it's just not extremely wet, it's ready to be used. 

Size comparison after wetting it- it doesn't fit into the container anymore!
I like to take it section by section from here, since I typically use Revlon ColorStay, which sets pretty quickly. I dab dots of the foundation onto one part of my face and then bounce the Beauty Blender around to blend out the makeup. When applying, you definitely want to bounce/pat the Beauty Blender across your skin, and not brush, swipe, etc. it. The supposed benefit of using the Beauty Blender over a brush is that the Beauty Blender will give you a more natural finish than brushing on foundation. With the Beauty Blender, you're literally pressing the foundation into your skin rather than brushing it over your skin, so it definitely makes it look more like your skin.

When using the Beauty Blender, you definitely have to be aware of the type of foundation you're using. If you're using something like Revlon ColorStay, which sets quickly, you don't want to dab it all over your face and then start blending, because it'll start to set as it's sitting on your face and you won't get the full effects of using the Beauty Blender. Also, you want to be careful that your foundation isn't too liquidy, because the B.B. is still a sponge, and it soaks up liquid, so it might soak up more of the foundation than it actually puts onto your face. 

I think the main thing it has going for it is that it's SO squishy and porous, so it can really give you the 'flawless' finish it claims. I've used it several times at this point, and I absolutely love the finish that it gives my face. The foundation gets blended evenly and looks really great on the skin. Even though I think $20 dollars is a bit too much for any sort of sponge applicator, I would definitely recommend it, because I think it gives my foundation a much better finish than any brush I've used to apply my foundation. 


 As you can see, the CVS knock-off has a completely different shape from the original Beauty Blender. I'm definitely of the opinion that the B.B.'s shape is better than the CVS knock-off. When using the B.B. you can use the bottom, but you can also get around a little on the sides of it. With this one, it's basically either the tip or the bottom.

With this one, you're supposed to use it dry, so you don't wet it down beforehand. The first thing I noticed when trying to use it was that it was very, very dense and thick. I wasn't even sure it should be called a sponge because it was just so dense. This made it nearly impossible to evenly apply foundation. It was so uneven that even though I tried to make it work several times, I don't think I ever left the house wearing foundation that was applied with this. It's just too dense, thick, and hard.

For me, there isn't even really a comparison between the two. It's much more worth your while to spend $20 dollars on the Beauty Blender, which actually works really well, than to spend $4 on a sponge that is almost unusable.

My (admittedly amateur) opinion is that if you're seriously interested in buying a Beauty Blender, you should just get the actual Beauty Blender rather than wasting your money on cheap knock-offs. Although I've only tried this one knock-off, I've picked up and squished/felt several other knock-offs, and none of them are as porous/squishy as the original Beauty Blender. Since that's what helps it to give foundation a natural finish, I didn't even consider wasting my money on anything that was harder or more dense than the original Beauty Blender.

The long and short of it is that overall, I really enjoy my Beauty Blender and would definitely recommend it over a brush or a knock-off.

Hope y'all enjoyed my review and that this helped you figure out if the Beauty Blender is worth buying. If you like my posts and want to keep up-to-date, it would be awesome if you'd follow/subscribe, since it lets me know you're enjoying what I'm doing! Thanks, y'all!